Showing posts with label BBA Challenge. Show all posts

Jun 23, 2010

Baking Update

I know it has been quite some time since I updated with baking news, but I wanted to let all (three?) of you know, I BAKED this past weekend!

I ended up making some Italian bread (using a Biga) and some Cherry turnovers on Father's Day. (Hey, some dads want to relax and have a cold one, while I prefer making it nice and hot in the kitchen first).

I think both came out fairly tasty.

I think I'm going to tackle scones and sandwich bread this weekend...as I am craving one and needing the other.

Apr 2, 2010

No challenge this week

Howdy Bread lovers!

There won't be a challenge this week, as I will be out of town for Easter Fun!  I will still be making bread, but not in a challenge-y way.

I will be making Lambropsomo, Lefse, and hopefully dinner rolls.  I will get some pictures and post them..as long as the loaves turn out ok :)

I made the list up BEFORE I checked the weather forecast.  Thankfully, most of the breads take a few hours to proof, which means I'll be able to spend some time with family outside, and make delicious foods for our easter dinner.

See you next week!

Mar 29, 2010

BBA Challenge Round 8: Cinnamon Raisin Walnut Bread

The Challenge Bread


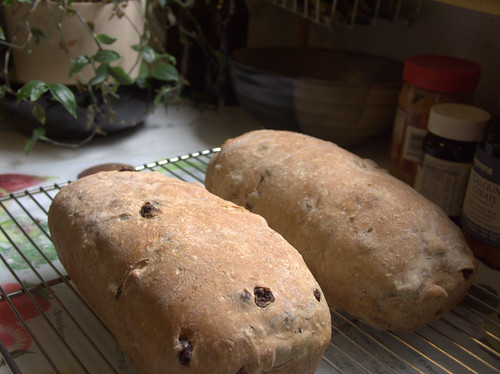
[caption id="" align="alignnone" width="500" caption="Mmm...Delicious bread of nutty raisin-y goodness"]PICT0770[/caption]

This week, we're making Cinnamon Raisin Walnut Bread!

Round 8 is done!

Well I finished up the Cinnamon Raisin Walnut Bread on Sunday, and I'll get the post up later this week.

I think I might slow it down a bit, as baking a challenge loaf every weeks means I don't get a chance to make "normal" bread.  I'll still try to post once a week, but I'll probably start talking about the challenges I'm facing (bread not rising as well as it used to) and how I plan to attack them (check yeast, ensure good kneading).

Hopefully, this blog will not only talk about what I'm doing with bread baking, but about baking in general and how to fit it in to a busy lifestyle.

Bread on!

Mar 21, 2010

BBA Challenge Round 7: Cinnamon Rolls

The Challenge Bread


This week, we're making Cinnamon Rolls!


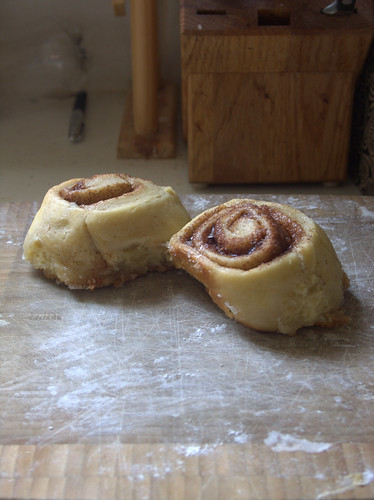
[caption id="" align="alignnone" width="374" caption="What's left of the Rolls after ONE day..."]PICT0743[/caption]

Mar 16, 2010

BBA Challenge Round 6: Ciabatta

The Challenge Bread


This week, we're making Ciabatta.
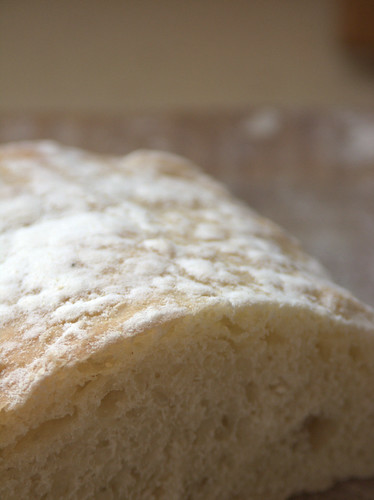
PICT0746

A Little History


I first remember having Ciabatta about eight years ago, when I ordered a sandwich and they asked me if I wanted it on Ciabatta...not knowing what it was I just agreed that is sounded good.  It is now one of my favorite breads to eat (and now make!)

The Ingredients


I went with the Poolish version of this recipe, as I haven't really made anything with a poolish yet:

  • Poolish

    • Bread Flous

    • Water

    • Yeast


  • Bread Flour

  • Salt

  • yeast

  • Water


Corn/Dairy Free changes


Since this a Primary loaf, there isn't much to it, hence no corn or dairy.  The taste and character comes from the baking.

The Shaping


The night before the baking, I made up the poolish and let it ferment in the fridge overnight.  This allows the yeast more time to break down the flour into delicious gluten.  The next day, I combined the ingredients with the poolish.  The dough is very wet and can be hard to work with.  The wetter, the harder, but the bigger the air pocket are.

Once I was done kneading the dough, I transferred it to the Generously floured counter.  I shaped the dough into a rough rectangle.  I then sprinkled another generous portion  of flour on top of the loaf.  Then, grabbing opposite ends of the dough,  I picked it up, and let it stretch to about twice the original size.  I placed it back down on the counter, and folded it up like a letter.  I lightly misted it with oil, covered it in plastic, and let it rest for 30 minutes.  I then did another stretching session.

After the stretching, I took a heavy Towel and setup a couche: a floured towel used to create crusty breads.  I let the loaves proof until they had "noticeably swelled."

The Baking


I preheated the oven to 500 degrees.  I put a cookie sheet on the topmost oven rack, while moving the other rack to the lowest setting.  Once the oven was up to temp, I put a cup of hot water into the steam pan, and put the loaves on the lowest rack.  After 30 seconds, I opened the oven, and sprayed the sides with water to generate more steam.  I did this twice more at 30 second intervals, and then turned the oven down to 450 degrees.  I baked the loaves for 10 minutes, and then rotated them 180 degrees and continued to bake them until they reached an internal temperature of 205.   I then placed them on a cooling rack for about an hour.

Results and My Final Thoughts/Notes


The end result was good.  The crust was fairly crusty, but not too hard.  I didn't get as big of air pockets as I wanted, but they were pretty good.

Again, I think one of the main things I learned this week would be timing.  I think I let the dough sit more than 30 minutes, as it kind of swelled out and almost off the pan!  Then, I think I over compensated and didn't let the loaves proof long enough on the couche.

As the saying goes, there's no bad homemade bread....unless it burnt.

Up Next…


Next week, we're making Cinnamon Rolls!

Comments? Suggestions?


So what do you think? Sound good?  Anything I should change/do better?

Mar 15, 2010

First BBA fail!

I had my first fail this weekend with regards to the challenge! This weekend I was attempting to make ciabatta and bought yeast since I was up in Rochester for the weekend. I left the loaf in the sun for a couple of hours to let it rise. I came back and reized the loaf had not changed shape or size.

So here's my tip of the week: check the date on your yeast BEFORE you start baking.

I'll be making a second attempt this weekend to NOT h e a fail.

Stay tuned!!

Mar 13, 2010

Let's go Ciabatta!

I'm working on the Ciabatta right now, so hopefully I'll have some news shortly!

BBA Challenge Round 5: Challah

The Challenge Bread


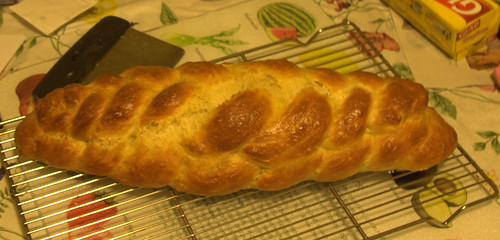
This week, we're making Challah.
PICT0676

A Little History


Challah is a Jewish celebration bread.  It is braided and sometimes a braid will be placed on top of a larger braid for a big celebration loaf.

The Ingredients


This one is pretty straight forward:

  • Bread Flour

  • sugar

  • Salf

  • yeast

  • Vegetable oil

  • whole eggs

  • egg yolks

  • Water


Make sure to save the egg whites to use as an egg wash later on.  I just put them in a bowl and covered it with plastic wrap and put it in the refrigerator while I prepped the loaves.

Corn/Dairy Free changes

There are no diary or corn ingredients in this bread.  No changes!

The Shaping

This is the first loaf that has required "real" shaping.  On the first non Giant celebration loaf, I took the dough and split it into three equal pieces.  This is where the scale was handy: Just because two pieces looked about the same, they often weren't.  I took the pieces, and shaped them into Boules, and let them rest for ten minutes under a towel.

After the mandatory rest period, I began shaping them into nice, long ropes of dough.  I started by rolling them on the table, slowly pushing them out from the center of the dough mass.  I that mostly worked, but I experimented with other methods as well.  I tried holding the dough "upright" and rubbing my hands like I was trying to warm them up, letting gravity pull the dough down.  That didn't work as well as the horizontal roll, but it wasn't bad.    The last method I tried was holding the dough with my hands at nine and three o'clock and slowly shaking the dough like you to a vending machine trying to get your stuck Doritos to fall.  While shaking, I slowly pulled the dough out, eventually ending up with my hands about three to four feet apart.  That seemed to be the best method on that day.

After I had three equal length ropes, I began my braiding from the center of soon-to-be loaf.  I braided down until I couldn't effectively make more cross over manuvers.  I then rotated the loaf and did it to the other side.  When I flipped the loaf, I needed to invert my braiding method: instead of taking the rope on the left and brining it over the top of the middle rope on its way to the right side, I needed to put it under the middle rope to keep the braid looking neat and not end up with a funky bump in the middle.  It took my brain a couple of attempts before I finally got it right.  I think it ended up looking pretty good for my first attempt.

The Celebration was very similar, but instead of one braid there were two: one on top that was half the size of the bottom loaf.  I did this by taking the dough and cutting it into three equal pieces and then combining two of those pieces.  I then took both lumps and cut them into three dough balls to make a total of six dough ropes.  I formed the bottom braid and put the smaller one on top and gave it just a little pinch to keep it from falling off.

I then gave the loaf a quick egg white wash, and let them proof under plastic wrap for about 2 hours, or until the loaf just about doubled in size.  I then gave the loaf another quick wash and let it rise until it was double the original size.

The Baking

I preheated the oven to 325 degrees.  I baked the loaves for about 45 minutes, until the internal temperature of the loaves reached 190 degrees.  The crust also turned a nice golden brown.  The curst wa

Results and My Final Thoughts/Notes


I really liked making the Challah.  Even though my shaping skills are not up to the level I would like them to be, I think I will be adding this into the normal rotation of breads.  It serves as a nice break from my "basic" loaves, and gives me a chance to try making "arts-y" bread.

Up Next…

Next week, we'll be tackling Ciabatta on the road!

Comments? Suggestions?


So what do you think? Sound good?  Do you have any butter/milk replacements that I should try?

Holy Missing Post!

Alright.

I admit I've fallen behind on my BBA Challenge post.  I have started the Challah entry, but this week got away from me.  I've been working on Anya's Site, which is still not quite ready, but I promise: Today you will have your Challah post!

Ciabatta is coming along alright...I think ;)

Mar 7, 2010

Challah is done

I managed to get the Challah finished yesterday. There wasn't any overnight Fermenting going on, so it came together pretty quickly.

I'll give you a sneak peak at the post: There's half a loaf left!

Feb 26, 2010

BBA Challenge Round 3: Artos: Christopsomos

The Challenge Bread


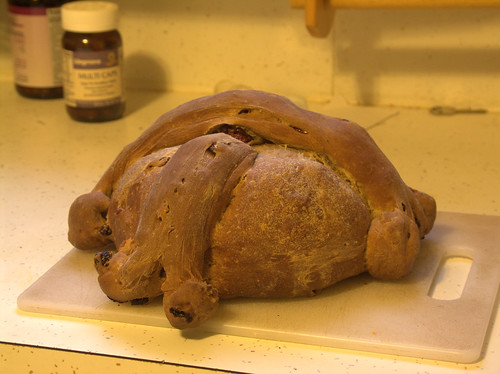
This week I tackled Artos which is greek celebration bread.  I chose the first variation which is Christopsomos.
PICT0641

Feb 21, 2010

BBA Challenge Round three is done!

Well I just took Round three out of the oven.  We'll see how it is tomrorow!

Quick thoughts:

  • It's a little darker than I would like, but not burnt.

  • The smell is amazing.  This is my first time baking that I really had a hard time not "sampling" as soon as it came out.

  • Always check your Parchment paper supply BEFORE shaping your loaves.


That's it for now!  I'll get the post and hopefully some pictures up shortly!

Feb 15, 2010

BBA Challenge Round two update

Well I completed round two of my BBa challenge and it was interesting. I will write up a full post tonight but a quick teaser: delciously dense

Feb 9, 2010

BBA Challenge Round 2: Bagels

For the next round of the BBA Challenge, I plan on making cinnamon-raisin bagels.  The next recipe in the book is Artos: Greek celebration bread, but the recipe calls for a bram (starter) and that can take a few weeks.  I will make the starter next week, and will hopefully get it going in time for Easter.

The bagels will be fun, as I haven't ever made them before.

Look for more posts this week about ingredients, techniques, and my game plan.

Bread on!

Feb 7, 2010

BBA Challenge Round 1: Anadama Bread - Baking and Results!

Well, I've finished round one of the BBA Challenge!  I think I'm off to a good start, and I think my Milladama bread is a mighty fine substitue.

BBA Challenge Round 1: Anadama Bread - Pre-Baking

Today is baking day!  I'm in a holding pattern right now.  The Original Recipe Anadama bread is proofing, while the Milladama is in the sponge stage.  I worked out the different steps I need to follow to complete one Recipe and discovered from start to finish it is about 5 hours...lots of Proofing time in there.  I decided to offset the baking by a few steps.  Here's the chart I made:

Feb 6, 2010

BBA Challenge Round 1: Anadama Bread

The first bread in the BBA Challenge is Anadama Bread.  Thankfully, it looks like it is starting out on a lighter note and should be a manageable first challenge.  I picked up the supplies I need this morning:

  • Coarse Ground Cornmeal (Polenta)

  • Bread flour

  • Instant Yeast

  • Molasses

  • Shortening


I couldn't find the Brer Rabbit Golden Molasses that Peter Reinhart suggests, so I went with Plantation Blackstrap.  Yes, it is going to give off a more potent Molasses flavor, but I enjoy it.

I started to prepare for tomorrow's baking by creating the "soaker" of cornmeal.  I just need to let it sit  overnight, so the cornmeal will soften a bit, and release of the sugars trapped in it.

Mark's Corn/Milk-Free Alternative

As part of the BBA Challenge, I want to attempt to make all the recipes so my Wife can enjoy them as well.  She is allergic to Milk, and sensitive to corn, so I will be replacing these when They appear in the recipe.  This will help me discover my abilities as a baker, and find alternatives that will not affect the characteristics of the loaves too much.

The only ingredient we need to repleace i the cornmeal.  I did some searching, and decided to try Millet.  IT seems to be the "go to" replacement.  I found a couple of Tasty sounding Millet-instead-of-Corn-bread recipes that will have to try at some point.

The only trick I've found so far, is Millet can be hard to find in some supermarkets.  I found Millet next to bird-type seeds in the bulk department, so I suggest starting there.  The Millet was whole, so I decided to try soaking it untouched, and soaking it after I ran it through a food processor to open the seed husk, while preserving the coarse texture.

You can see the pictures I've taken on my Flickr BBA challenge page located here.

Tomorrow is baking day.  I plan to take more pictures and write up as I go.  Maybe I'll even ustream it!